Anyone who gets email newsletters has probably heard of a company called MailChimp. With its funny name and logo, MailChimp has become a dominate provider of email newsletters.
What isn’t as apparent is a RSS feature within MailChimp that allows you to create MailChimp RSS Newsletters On Autopilot.
MAILCHIMP RSS NEWSLETTERS ON AUTOPILOT
You might be wondering what RSS is. RSS stands for Really Simple Syndication and was developed as a way to easily distribute website articles and posts via headlines, updates and content. Users of RSS can subscribe to RSS feeds allowing them to receive updates when a website has new content. Rather than going to the website directly, they receive a feed usually providing a highlight of whatever content they subscribed to.
In WordPress the RSS feed is simply found by adding “/feed” to the end of a website’s URL. So for example Hang Ten SEO’s feed URL would look like https://HangTenSEO.com/Feed
OK, but what does a RSS feed have to do with a MailChimp Newsletter?
Great question. Rather than having to manually create Newsletters every week or month, with a RSS feed added, the Newsletter can be pre-populated with the latest website posts that are coming directly from the RSS feed.
Pretty cool right.
What this means is you can setup a RSS Newsletter to automatically go out to your email subscribers showcasing your latest posts.
SUMO PLUGIN | LIST BUILDING
Email Marketing often referred to as lead generation is a way to promote your brand though emails and Newsletters.
Before you can send out a Newsletter you will need an email list of subscribers. One of the best plugins I have found to capture Newsletter subscribers is a plugin called Sumo. The Sumo Plugin allows you to create various list building forms that you can then make visible on your website.
For my GearMashers website I implemented a 3 form strategy.
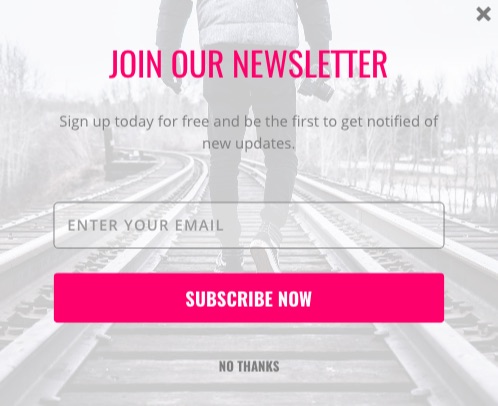
The first email subscriber form is visible after 5 seconds of being on the website. Yes I know these types of popups are really annoying, but the simple facts are they work and are a great way to capture an audience’s email.
The second email subscriber form is visible at the top of the website. This type of Newsletter subscriber form is much less intrusive, but often gets overlooked by the user.

The 3rd email subscriber form will be visible on the sidebar.
I couldn’t figure out a way to do it yet with Sumo. I am waiting on a response from them. Seems easy enough to implement though.
Is there a downside to SUMO?
Yes. Currently you have to have a paid subscription in order to integrate it with MailChimp or a host of other email providers.
MAILCHIMP WORDPRESS PLUGIN
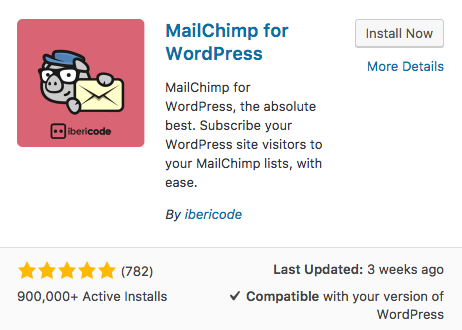
Before you can mess around with MailChimp’s RSS functionality, you will need to add the MailChimp plugin to your WordPress website. To do so, simply go to the WordPress menu option Plugins –> Add New and search for MailChimp for WordPress. Once you find it, install it and activate it.
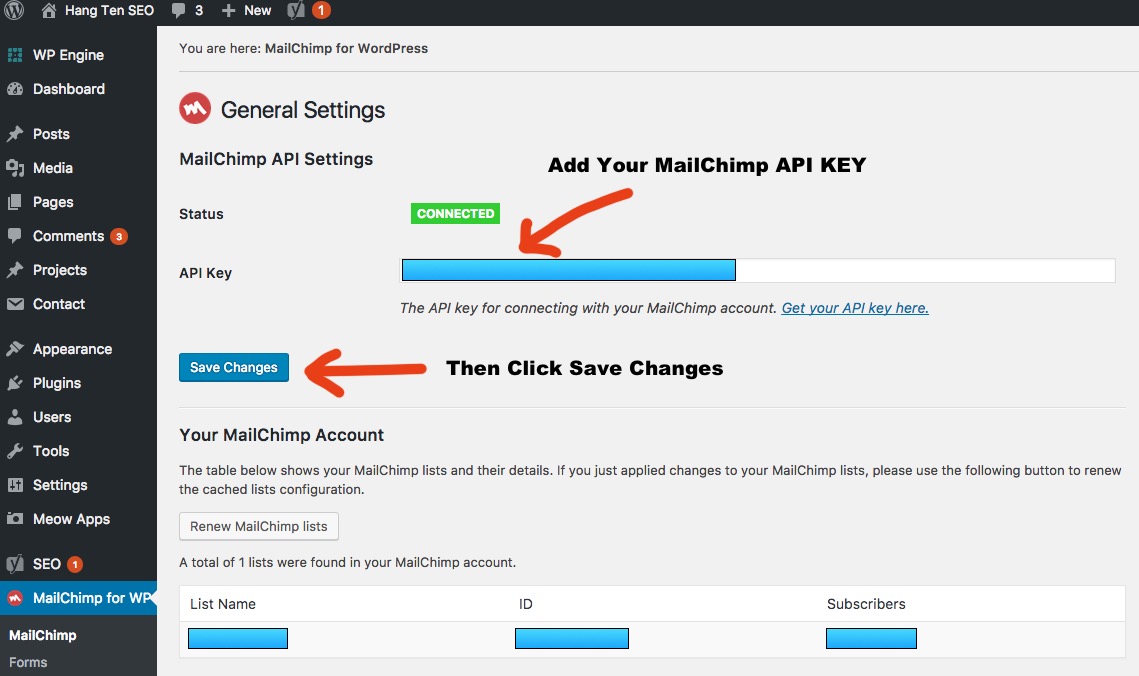
If this is your first time using MailChimp (https://mailchimp.com, you will need to setup a MailChimp account. Once the account is setup, you will also need a MailChimp API Key which will be used to connect your MailChimp account to the WordPress MailChimp plugin. This will allow MailChimp to communicate with your website. The API key can be found in MailChimps menu option Extras –> API Keys.
Once you have your MailChimp API key, you can go back into the WordPress MailChimp plugin’s General Settings screen to add you API Key.
FEATURED IMAGES IN RSS & MailChimp Email Plugin
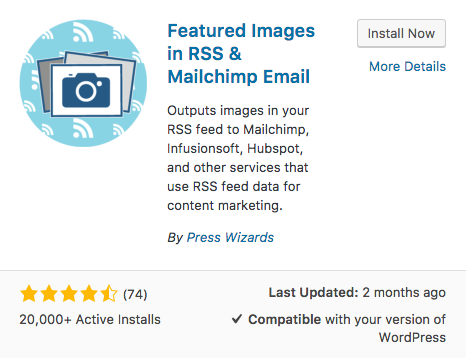
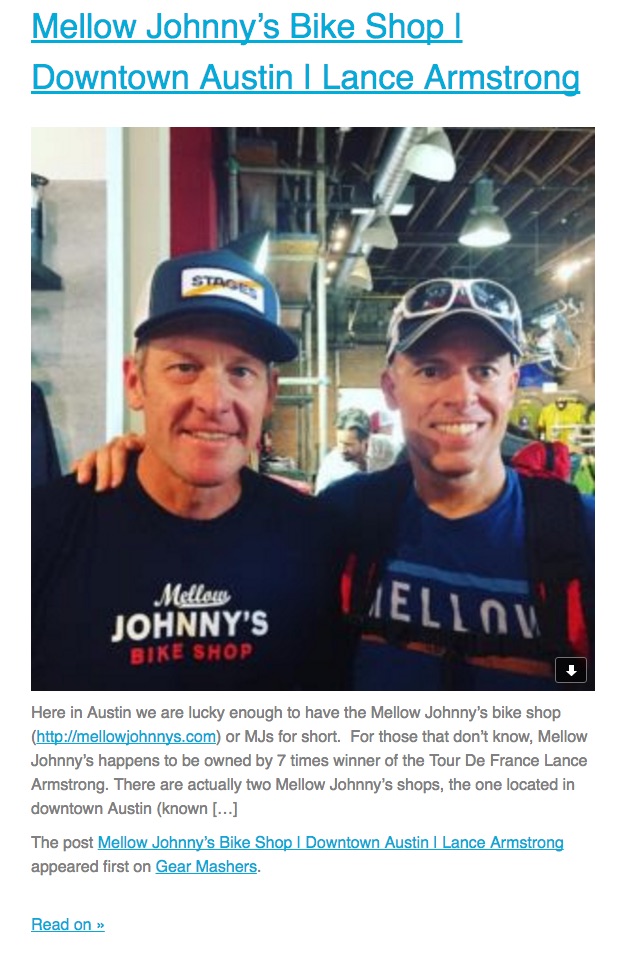
When you create a post in WordPress you have the ability to include a Featured Image. Currently that image doesn’t show up in the RSS feed, but luckily a plugin was created called Featured Images In RSS & MailChimp Email, which adds the featured image to the feed. The reason why this is important is because when setting up the RSS Newsletter, including a Featured image makes each post/article pop and more likely to get people to want to read more.
Here is an example of what a featured image looks like that was pulled from the feed.
To add theFeatured Images In RSS & MailChimp Email plugin, simply go to the WordPress menu option Plugins –> Add New and search for Featured Images In RSS & MailChimp Email. Once you find it, install it and activate it.
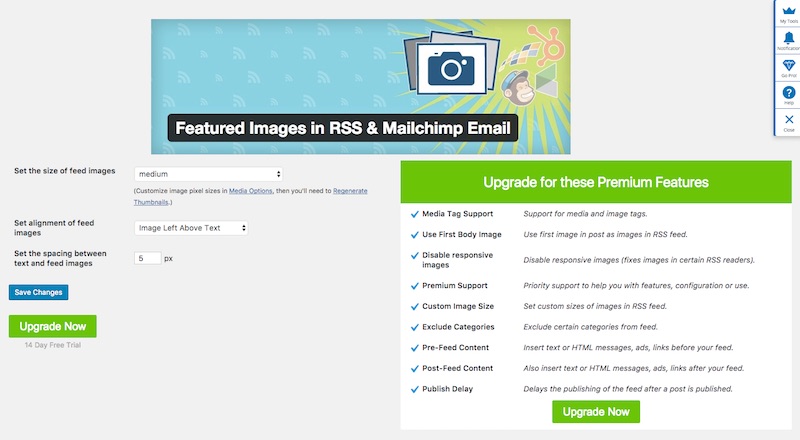
Once the plugin is activated, you will have the ability to adjust the feed image size and alignment.
My settings are set to
- Set the Size of feed Images: Medium
- Set alignment of feed Images: Left above text
- Set the Spacing: 5px
SETTING UP A MAILCHIMP RSS NEWSLETTER
At this point we have accomplished the following
- Created A MailChimp Account
- Added the MailChimp for WordPress plugin
- Added the API key to the MailChimp plugin (Allows MailChimp to directly communicate with the website)
- Added the Featured Images In RSS & MailChimp Email plugin
- Created a list of email subscribers (Sumo).
With the above all setup, we are now ready to setup a new MailChimp RSS Newsletter. From here on out we don’t need to mess with WordPress, we will be only working within MailChimp.
To setup a MailChimp RSS Newsletter you need to create a new MailChimp Campaign. Campaigns are MailChimp’s terminology for our RSS Newsletter.
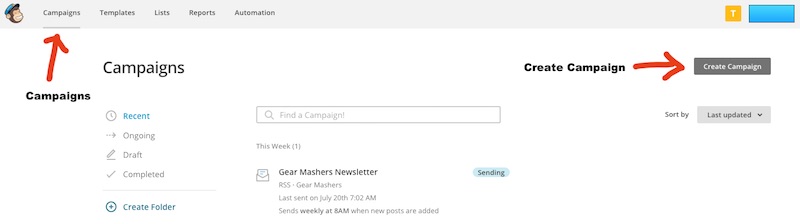
After clicking the Create Campaign button you will be presented with a few options. Choose the “Let Us Guide You” option and click the button.
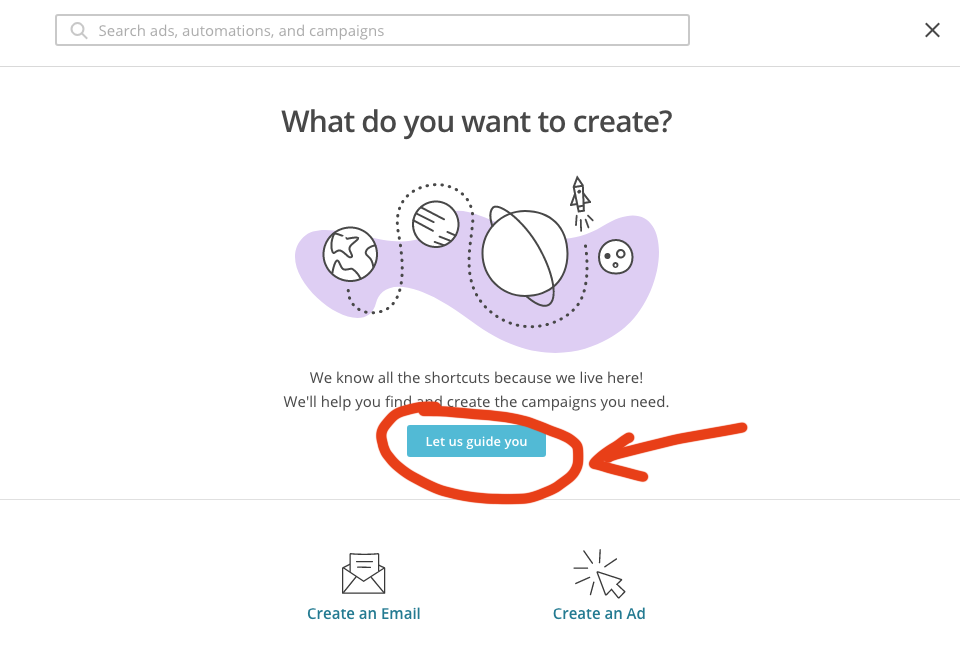
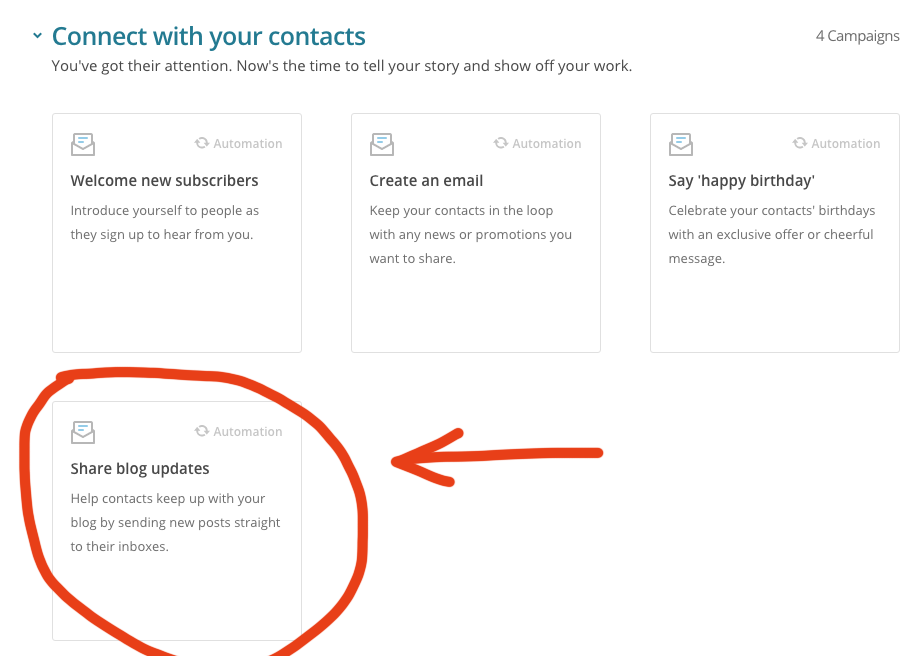
Choose the Option for Connect With Your Contacts and Choose Share Blog Updates
SETTING UP THE MAILCHIMP CAMPAIGN
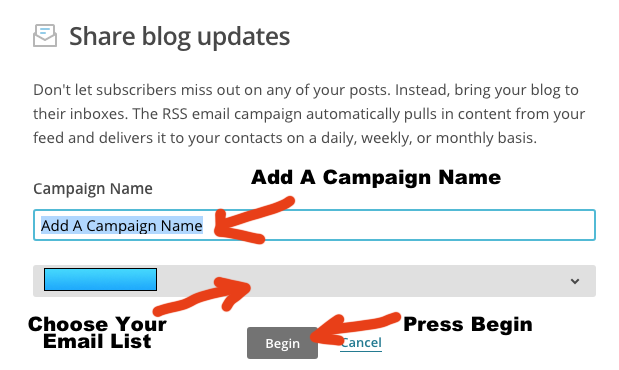
To share blog updates you need to add a Campaign Name, select an Email List you want the Newsletter to go to and press Begin.
NOTE: If you don’t have an email list of subscribers, you may want to pause at this point until you have a list. Once you do, you can continue to build your MailChimp RSS Newsletter.
RSS FEED AND NEWSLETTER TIMING INTERVAL
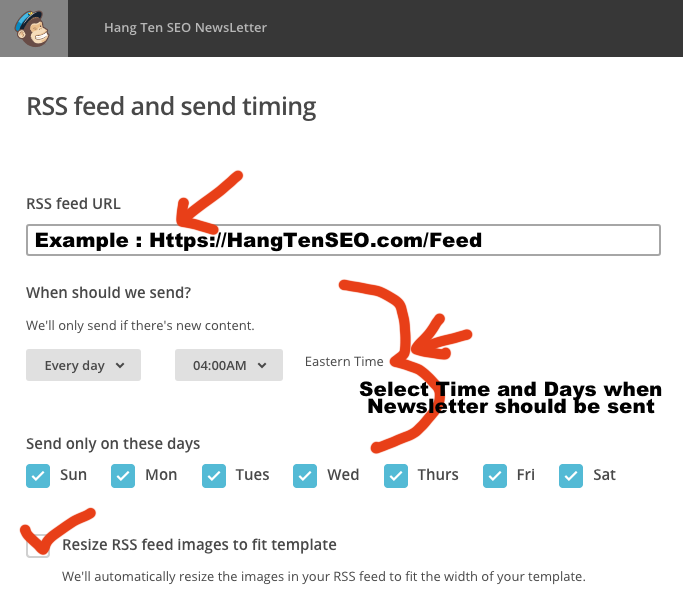
When setting up the RSS Feed URL, you want to make sure to use your website’s feed. Example: https://HangTenSEO.com/feed
When setting up the time and days you want your RSS Newsletter to go out, choose an interval that makes sense for your readers and makes sense based on how often you update your website with new posts. If you only update your website once or twice a month, it probably only makes sense to send out a Monthly Newsletter. If you post more articles, then it might make sense to send it out a weekly.
Sending it out at 4am is usually a good idea because people will often read emails with their smartphones prior to going to work. Having the emails in their inbox early gives you a better chance of it being read.
Make sure the Resize RSS Feed checkbox is checked. MailChimp will optimize the image sizes for email and phone.
CHOOSING AN EMAIL LIST
On The Recipients screen you can choose who the Newsletter will go to. In MailChimp Lists are essentially email lists that have been collected over time.

MAILCHIMP’S EMAIL & CAMPAIGN INFO
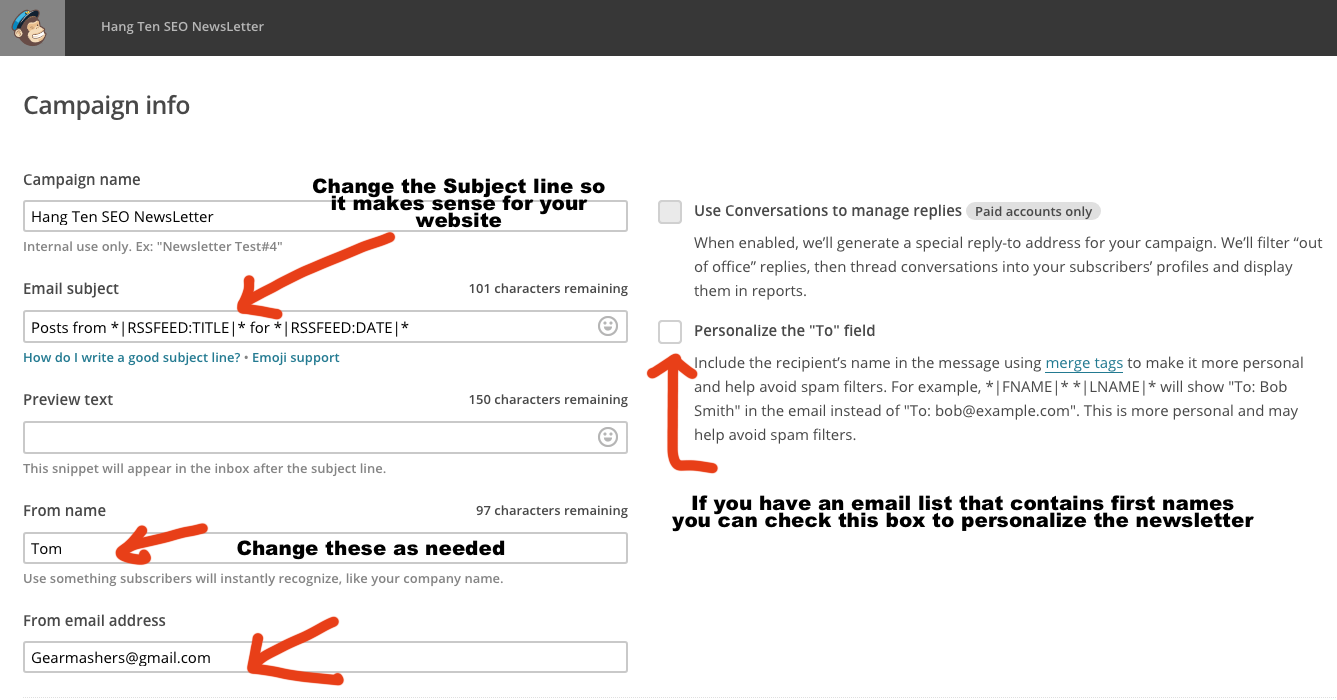
On the Campaign Info screen you will most likely want to change the following lines to match your specific website information
- Email Subject
- From Name
- Email From Address (If the email listed isn’t the one you want to use)
The Email subject line initially will contain some MailChimp RSS code
- *|RSSFEED:TITLE|*
- *|RSSFEED:DATE|*
You may want to include one or both of these in the subject line.
Example: GearMashers.com Cycling Newsletter – *|RSSFEED:DATE|*
Personalize the “To” Field checkbox – is used if you want to personalize the email with a person’s first and last name. If you have an email list that doesn’t contain those items, you may want to keep it unchecked.
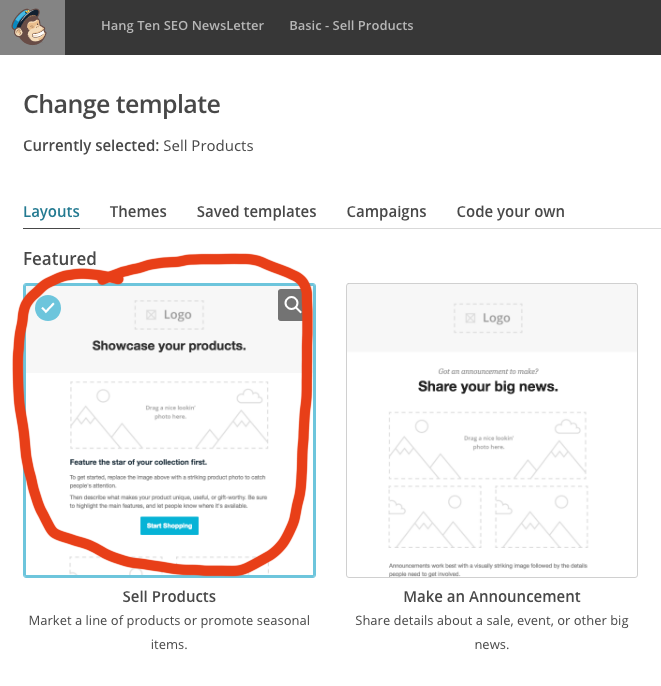
CHOOSING A MAILCHIMP TEMPLATE
Next it is time to choose a Newsletter Template. Normally I just choose the Sell Products template since it is easy to work with.
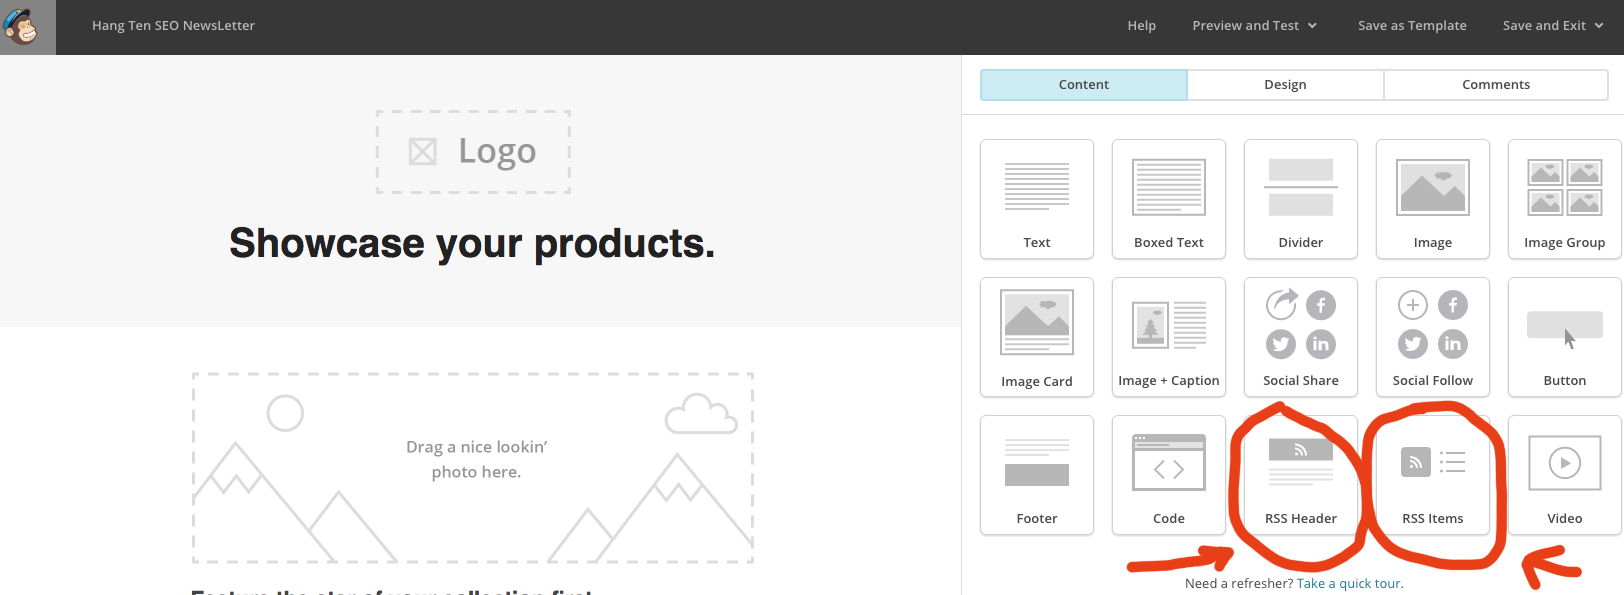
MAILCHIMP’S RSS HEADER & RSS ITEMS WIDGETS
Finally we are getting to the meat of MailChimp’s RSS Newsletter. MailChimp provides 2 widgets called RSS Header and RSS Items. You will use both of these widgets in your RSS Newsletter to display the latest posts.
MailChimp has a full breakdown of all the RSS Tags (Channel and Item tags) that can be used. Below are some of the more common ones
CHANNEL TAGS
Allow you to pull information from your Websites RSS feed such as Title, Date, URL and Description.
- *|RSSFEED:TITLE|* The title of your blog or RSS feed “channel.”
- *|RSSFEED:DATE|* The date your RSS feed was last updated. This tag allows you to include date formatting options, which are available at php.net. Use *|RSSFEED:DATE:FORMAT|* Shows the current date in a given format. For example, *|RSSFEED:DATE:d/m/y|* where “d” is replaced by the day, “m” by the month, and “y” by the year.
- *|RSSFEED:URL|* The URL of your source RSS feed or “channel.” This tag can be displayed as text or used in a hyperlink.
- *|RSSFEED:DESCRIPTION|* The description of your blog or RSS feed “channel,” found in the <channel><description> tag.
ITEM TAGS
Are used to customize how your individual blog posts appear, such as the Titles, Posts, or Social Share Links.
- *|RSS:RECENT|* .A linked list of the five most recent post titles made prior to the new posts pulled into your campaign since the last send.
- *|RSS:RECENTxxx|* A linked list of the most recent post titles made prior to the new posts pulled into your campaign since the last send, based on the number given for “xxx.”
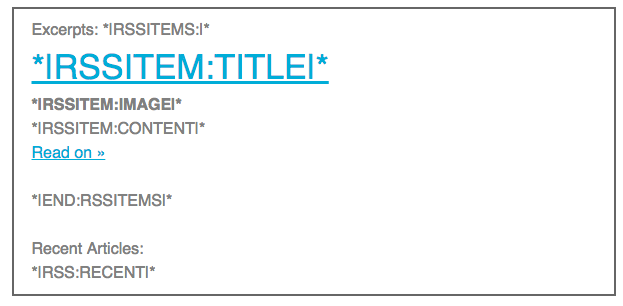
- *|RSSITEMS:|* This tag doesn’t display anything. It’s used to open the customized formatting for individual RSS item
- *|END:RSSITEMS|* This tag doesn’t display anything. It’s used to close the customized formatting for individual RSS items.
- *|RSSITEM:TITLE|* The title of the RSS item, usually a blog post.
- *|RSSITEM:URL|* The text link to the RSS item online, which can be displayed as text or used in a hyperlink.
- *|RSSITEM:DATE|* The date the RSS item was published. This tag allows you to include date formatting options, which are available at php.net. Use *|RSSITEM:DATE:FORMAT|* to show the current date in a given format. For example, *|RSSITEM:DATE:d/m/y|* where “d” is replaced by the day, “m” by the month, and “y” by the year.
- *|RSSITEM:IMAGE|* In certain feed set-ups, this tag displays the image defined in the <media:content> tag. Child elements like height, width and source URL aren’t editable in MailChimp, but can be included in the RSS feed on your site.
RSS HEADER
The RSS Header widget will display your RSS header information.
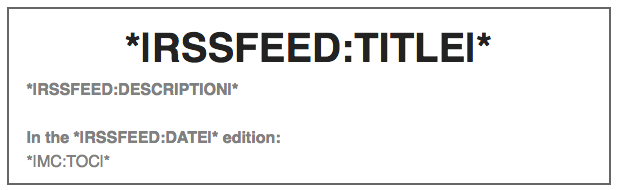
For example, this is what the RSS Header looked like for my first GearMashers.com newsletter.
Depending on how you want the RSS Header to look like in the email, you can add text or remove text as necessary.
Going forward with my newsletters, I would probably change the RSS Header to look something like
GEARMASHER’S WEEKLY POSTS
*|RSSFEED:DATE|* edition Newsletter
*|MC:TOC|*
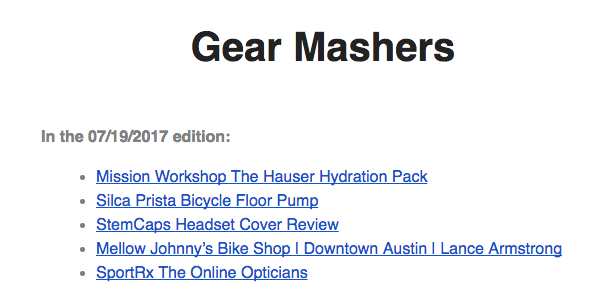
RSS ITEMS
The RSS Items widget will display your latest WordPress posts.
Note: In order to use *|RSSITEM:Image|* you will need to have added the Featured Images In RSS & MailChimp Email Plugin first.
CONFIRM MAILCHIMP EMAIL
After you have finished designing your email template, the next stage is to confirm it.
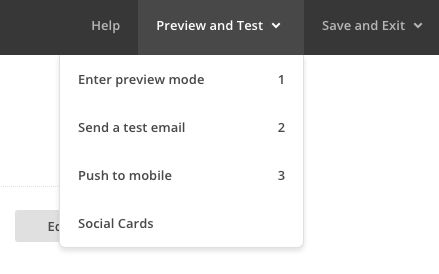
TEST TEST TEST BEFOR YOU SEND THE NEWSLETTER
It is recommended that you test the newsletter using the following methods.
- Viewing the Newsletter in preview mode
- Sending a test newsletter to your email and see what it looks like
- Viewing it on a mobile device.
- Once you are satisfied that the RSS Newsletter looks good, you can save it and start you email campaign. Hopefully if you have done everything correctly, you will be sending out great looking RSS Newsletters to all your friends and subscribers.


